



Knowing how to prepare for a pelvic ultrasound can make a real difference in how smoothly your exam goes — and how clear your results turn out. The good news: preparation is simple, and the procedure itself is safe, painless, and free of radiation.
Here's a quick summary of what to do before your appointment:
A pelvic ultrasound uses high-frequency sound waves to produce images of your pelvic organs — including the uterus, ovaries, cervix, and fallopian tubes. It typically takes 15 to 30 minutes, and you can return to your normal activities right after. At Advanced Medical Imaging, we're here for you every step of the way.
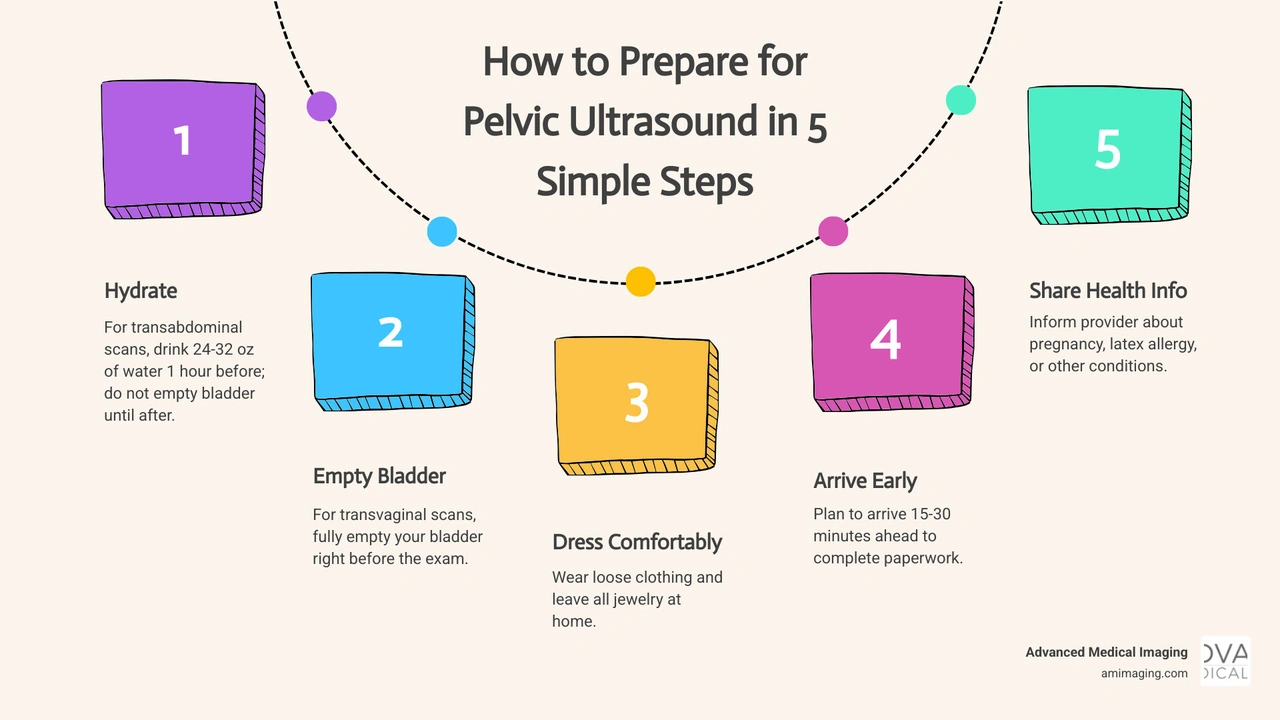
How to prepare for pelvic ultrasound vocab explained:
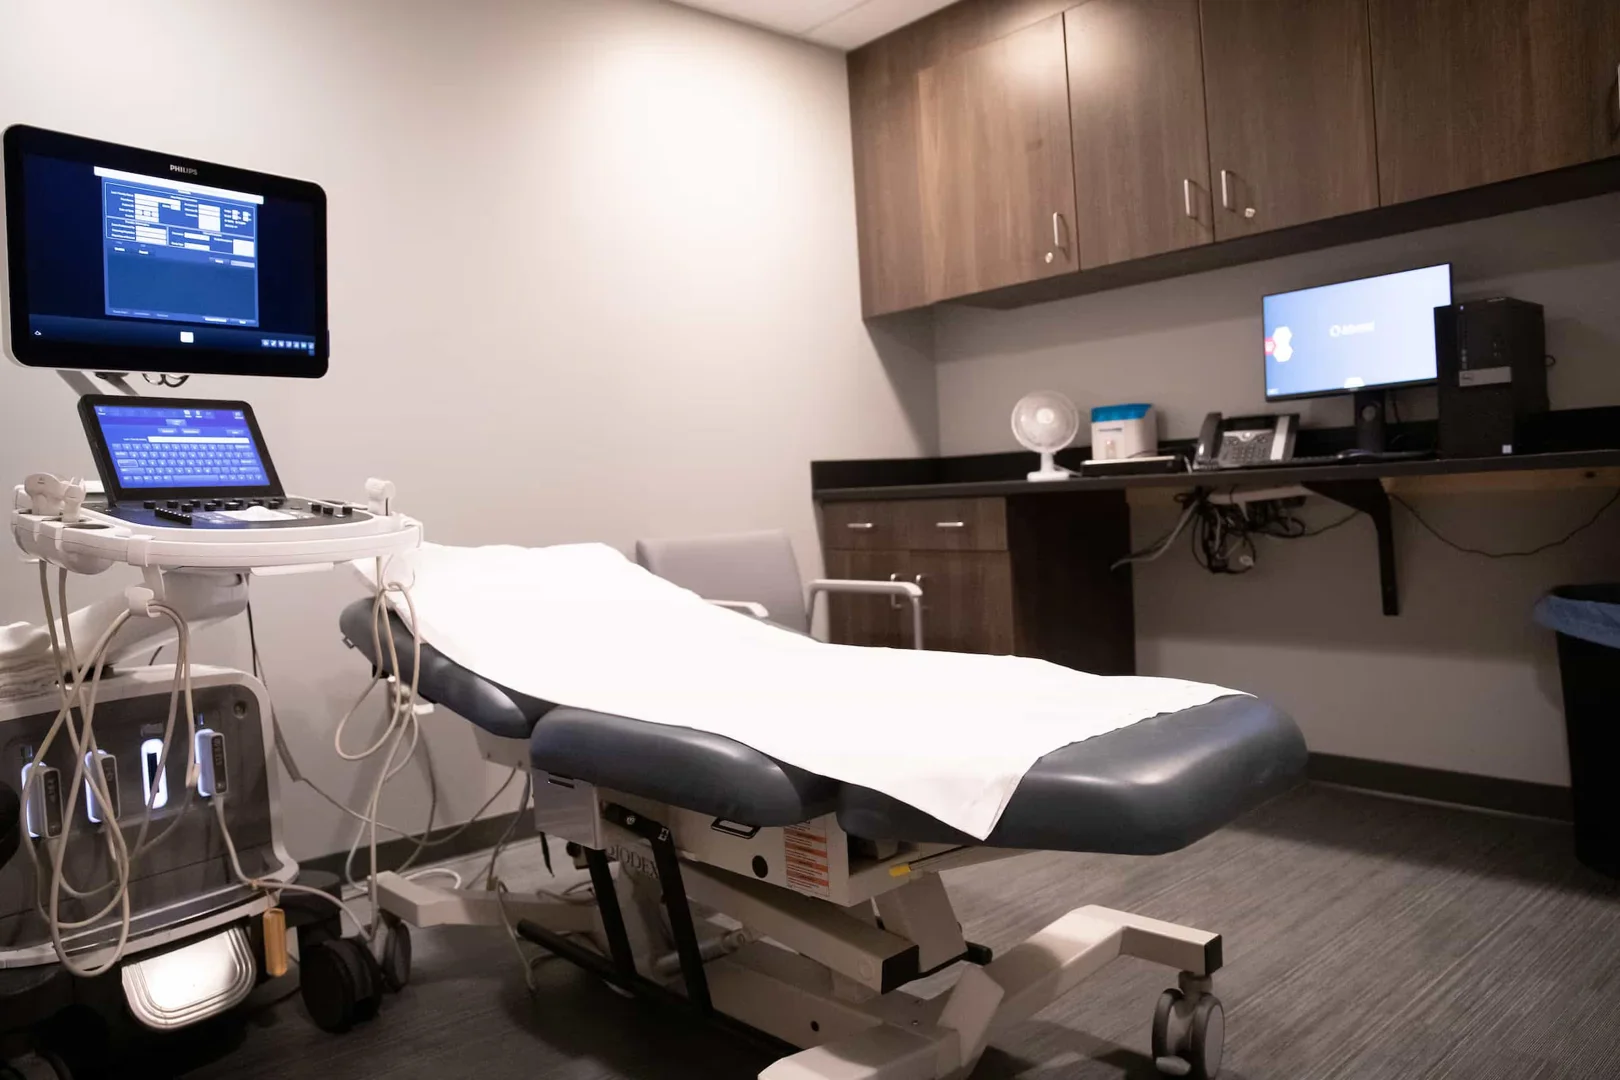
Getting ready for your imaging appointment does not have to be stressful. By following a few simple guidelines, you can help us obtain the clearest possible pictures of your pelvic anatomy.
Our goal is to make your experience as comfortable and efficient as possible. Let’s break down why this test is performed, the different methods we use, and the exact steps you need to take before arriving at our facility.
Your physician may request a pelvic ultrasound to evaluate the organs and structures within your lower abdomen. This noninvasive test provides detailed, real-time images of the female pelvic organs, including the uterus, ovaries, cervix, and fallopian tubes.
Common clinical reasons for ordering this scan include investigating unexplained pelvic pain, identifying the source of abnormal bleeding, or evaluating pelvic masses like fibroids and ovarian cysts. It is also an essential tool for monitoring fetal development during pregnancy and assessing fertility concerns.
By utilizing Scientific research on pelvic ultrasound indications, healthcare providers can pinpoint issues quickly without exposing you to radiation. To learn more about what we can identify during your scan, you can read More info about what an ultrasound shows.
A pelvic ultrasound is often a two-part exam, depending on your specific symptoms and what your doctor needs to see. The two primary methods are transabdominal and transvaginal, and each requires a different type of preparation.
A transabdominal ultrasound is performed by gliding an electronic device called a transducer over your lower abdomen. To get a clear view, we use your full urinary bladder as an "acoustic window." The fluid in your bladder helps push your intestines out of the way, allowing high-frequency sound waves to travel smoothly and capture a broad view of your pelvic organs.
A transvaginal ultrasound, on the other hand, provides a closer, highly detailed view of the uterus and ovaries. For this approach, a slender, lubricated transducer is gently inserted directly into the vagina. Because the probe is positioned much closer to the organs, it delivers exceptional image clarity.
According to Clinical guidelines on pelvic imaging, these two methods are frequently combined to give our radiologists the most complete diagnostic picture. For more details on how we perform these procedures, check out More info about our ultrasound services.
Preparing for your pelvic ultrasound is straightforward. Following these five steps ensures your comfort and helps our team capture high-quality images.
For additional details on clinical instructions, you can view Patient instructions for pelvic ultrasound as well as More info about ultrasound preparation.
Some situations require a slightly different approach to preparation. If you are pregnant, have an intrauterine device (IUD), or have specific allergies, please keep the following guidelines in mind:
By adhering to the established AIUM practice parameters for female pelvic ultrasound, our clinic ensures high standards of safety and diagnostic accuracy for every patient.
Now that you know how to prepare, let’s talk about what actually happens on the day of your appointment. Understanding the process can help ease any lingering anxiety.
When you arrive at Advanced Medical Imaging, our team will guide you to a private exam room. For a transabdominal scan, you will lie on your back on a comfortable padded table. The sonographer will apply a warm, water-based gel to your lower abdomen. This gel eliminates air pockets and helps the transducer move smoothly over your skin to transmit sound waves.
For a transvaginal scan, you will lie on your back with your knees bent, similar to the position used during a routine gynecological exam. The sonographer will gently insert the covered, lubricated transducer about two to three inches into the vagina. You may feel a sensation of mild pressure, but the procedure is generally not painful.
The entire exam typically takes between 15 to 30 minutes. Because ultrasound utilizes high-frequency sound waves, there is absolutely no radiation exposure involved. Once the scan is complete, you can wipe away any remaining gel, empty your bladder, and resume your normal daily activities immediately.
To help you prepare mentally, you can read this Patient guide on what to expect during an ultrasound. For more resources on pelvic wellness, visit More info about our women's center.
Is a pelvic ultrasound safe?
Yes, diagnostic ultrasound is considered exceptionally safe. It does not use ionizing radiation, and there are no known harmful side effects when performed by trained healthcare professionals.
Can I drive myself home after the procedure?
Absolutely. There are no sedatives used during a standard pelvic ultrasound, so you are perfectly safe to drive yourself home or return to work right after your appointment.
How long does it take to get my results?
Our fellowship-trained radiologists will carefully review and interpret your ultrasound images. A detailed report will be sent directly to your referring physician, usually within 24 to 48 hours, so they can discuss the findings with you.
At Advanced Medical Imaging, we're here for you every step of the way. Our fellowship-trained radiologists use state-of-the-art technology to provide clear, timely, and accurate results. We are conveniently located with same-day appointments available, and we are open 7 days a week to fit your schedule.
Ready to book your scan? Schedule your pelvic ultrasound with Advanced Medical Imaging today.
.png)


